Friday, November 23, 2012

Black Friday Blog Hop & TE Studio Challenge


HI Everyone,

Hope you had a wonderful Thanksgiving! I am so thankful for all things big and small, family and friends and to be part of the wonderful global crafting family! As today is the start of Black Friday - we are going to celebrate that with the Baker's Dozen Studio Challenge and a BIG Black Friday Sale at Taylored Expressions! 

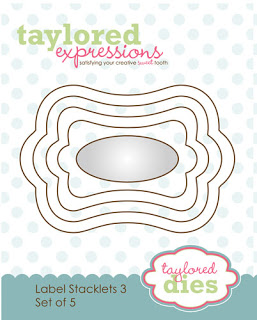
Today, Taylor will be releasing a brand new set of Stacklets: Labels Stacklets 3 - which coordinates with the Frame it Up 1 die - so when you are shopping today - you get to buy these dies as part of the sale!! Woohoo!!!

Each month, the Taylored Expressions design team has a  Studio Challenge  where we answer a question and create a project based on a challenge. So the challenge question for November is:

As crafters, we often talk about a hand-crafted Christmas. How much stamping do you do for the holidays?  Do you mail hand-stamped cards, make gift packaging, tags, handmade gifts?  Or do you stamp year-round, but not so much for Christmas?  Please show us some handmade tags and share a tip or two on how to keep stamping fun for the holidays.

How much stamping do you do for the holidays? 
Well for me, the holiday season starts right around the time I have to make costumes for Halloween! And then we celebrate Diwali (the Indian Festival of Lights) which is a super busy time around the same time as Thanksgiving, and then after that comes so many family birthdays in the month of December and teacher appreciation gifts for the holidays and then traveling to go see family for Christmas - it is a super crazy busy time - so the answer is - I stamp as much as I can - but it never seems to be enough!!! LOL! I must need to figure out a way to make the days last longer!

Do you mail hand-stamped cards, make gift packaging, tags, handmade gifts?
My favorite is to make handmade gifts - I love making special things for family and friends and then wrap them with handmade tags. There are a few friends that I send their handmade tags, presents and cards in the mail (always cutting it close at the post office!!).

Do you stamp year-round but not so much for Christmas?
I used to stamp year round for Christmas - but as the kids have grown up it hasn't been easy to keep a regular stamping schedule... but I love my stamp therapy and hope to stamp for Christmas year round this year! :)

Tips for stamping during/for the holidays:

Ha! I am not much of a tip person - but here are a few things that work for me:

  • Making lists always helps - I have categories of kids, teachers, family and friends and that helps in figuring out how many tags/cards I need to make - which makes mass producing them way easier. I can try to do all the kids stuff in one day and the same for teachers and friends. The family ones take a bit longer for personalizing each one
  • Coming up with a layout, figuring out your papers ahead of time - this is always why it takes me 4 hours to make a card - because I am constantly trying to figure what I want to do and what supplies I need. Once the layout is decided - then its easy to start mass producing - 
  • Tupperware containers :) - I keep a box or two of tupperware containers by my craft area - anything that I finish goes right in the box - otherwise what usually happens is that it gets lost somewhere on my craft desk :) I have another longer container ( 8x11 size) for projects that aren't finished yet - so that all the little pieces of a project don't get lost. The tags below were made over 3 days - one day was die cutting the labels, the next in the snowflake die cutting and assembly, and the last in putting together and stamping. After each step, I just put it in my container and take it out the next day - so that my craft desk doesn't swallow my projects :)
  • I would love to hear your tips for stamping during the holidays! Please let me know what works for you - I am always on the lookout for ideas and helpful hints!

Let It Snow Tags:

For today's studio challenge, I made a set of tags using the newest stacklets: Labels Stacklets 3 and the awesome set of snowflake dies: Make a Snowflake (which die cuts: 6 different dies) with the stamp set: the Cool Crowd. Here are what the tags looked like:


I started by die cutting the largest of the stacklets in white and embossed it with some large dots - and then layering the stacklets with the Frame It Up 1. One tip when using the Make a Snowflake die set is to run all the dies at once (not to separate them into individual dies) - by doing this - just run the die set through your die cutting machine only a few times and you have a choice of snowflakes to assemble together. I picked two snowflakes to put together and assembled them with a little dimensional in between and then with a button on the center from the Teal Ice button collection. I wrapped some twine, added a line of liquid pearls and then stamped the little birdie and sentiment from the Cool Crowd stamp set for each tag. I LOVE the font on this sentiment - it feels so jolly :) And the little cutie bird is too sweet with his hat!!

The snowflake was adhered to vellum and then the whole tag was tied with some White Glimmer ribbon - here is another picture of all the tags - I LOVED making these tags - and can't wait to make more!! Can't believe the year is almost over and the holiday season is really upon us!!!


Tag Recipe:
StampsThe Cool Crowd
Inks: Memento Teal Zeal and Tuxedo Black (copics for the little birdie)
Papers: Bazzill cardstock and kraft
Accessories: Labels Stacklets 3Frame it Up 1 dieMake A Snowflake dies (set of 6), Teal Ice buttons, twine, dimensionals, eyelets, White Glimmer ribbon and Cuttlebug embossing folder:

Please check out all the wonderful tips, hints and tag creations from the wonderful Baker's Dozen!
AND - to kick off Black Friday, Taylor is offering a HUGE Black friday sale starting NOW! Please check out Taylor's Blog for all the details - you won't want to miss this!!

Thanks so much for stopping by!!
For all my US friends - have a safe and wonderful Thanksgiving! 
Grateful for all of you!
Big hugs, 
Sankari :)

PS - here are the dies used in today's project: Make A Snowflake Set of 6 Dies and Frame it Up 1 die and Label Stacklets 3:

Taylored Expressions November Release Spotlight Day!!!

Hi Everyone!
All of the brand new awesome stamps and dies that we have been sneak peeking this week are available at the Taylored Expressions store!! You can check out all the new products at the Fresh Out of the Oven Department!

For my project today, I created a little home decor block using the Mega Leaves dies with some cardstock and the image from the Simple Stories DP (from my October Key Ingredients Kit). I painted a wooden block a copper brown color and then die cut the leaves with some colored cardstock and then sponged the edges with a little bit of brown. I love these dies and the impressions that they make are nice and deep. My favorite was die cutting some gold paper that I then crumpled up. The sentiment is from the 6x6 Simple Stories paper pack that was part of the October Key Ingredients kit added the sentiment to the block with some dimensionals and then added a scalloped border to either side of the images. I finished it off with some red ribbon (2 different size bows) to the top that I also wound around the block. I love seeing this little home decor block every time I come home!
Project Ingredients:
Paper: Simple Stories Harvest Lane and different colored card stock
Accessories: Mega Leaves dies from TE, ribbon, paint, wooden block, Small Scallop die and liquid pearls

I can't wait to see all the lovely projects that these amazing ladies have created using all these lovely stamps and dies!!!  Please hop along with me and check them out!!


Thanks so much for stopping by today!
Big hugs,
Sankari :)

Tuesday, November 20, 2012

Happy Birthday Cake!

Hi Everyone,

Hope you are all doing well! I love making cards for my dear friends and made this card for the daughter of one of my besties who celebrated her birthday this weekend. I used the Oh What a Day stamp set from Taylored Expressions to make this birthday card.

I love this stamp set illustrated by Emily Burger - it is filled with stamps and sentiments that can be used for all different occasions - love that versatility!!! I stamped the sweet little cake and paper pieced the cake and then added some glitter over the cake and some liquid pearls on the candle flames. I loved making a banner from the Lace Chain Border die and adding some twine to the edges - pennants make everything so festive!! :)

Card Ingredients:
Stamps: Oh What A Day by Taylored Expressions
Paper: My Mind's Eye
Inks: Memento Tuxedo Black
Accessories: small heart punch, heart bling, yellow polka dot ribbon, EK success label punch, liquid pearls (gold), glitter, Lace Chain Border from Taylored Expressions

I loved making this card - it was so much fun to make a colorful card and to create the banner - but the best part was giving this card to her on her birthday! Love that feeling!! Can't wait to create more cards with this super cute set! And don't forget there will be a huge sale this Friday after Thanksgiving - please check out Taylor's blog for more details!

Thank you so much for stopping by today!
Big hugs,
Sankari :)
PS - here is the link to the Lace Chain Border die from Taylored Expressions


Thursday, November 8, 2012

Taylored Expressions November Release Day!!!


Hi Everyone!
Welcome to Release Day at Taylored Expressions where today we are celebrating the release of all the new stamp sets and dies that are so cute and adorable that so darling for all occasions!! All of the new Taylored Expressions products are now available in the Fresh Out of the Oven Department. Be sure to check the TE Current Specials page to find out how you can get the Crafty Expressions stamp set for FREE!

For my project today, I used the super cute stamp set: Garden Shed designed by Doug Applegate, which comes with such sweet sentiments - my favorite of which is "the road to a friend's house is never long" ... I love that sentiment!. First I sponged a cloud background using the Cloud Border Die and then stamped the shed twice - I colored the roof on one of the stamped images with blue and green copics and then colored the "body" of the shed on another and then cut the roof and layered it onto one image. 


I also cut the windows out (so that the shutters open) and the windows and doors are layered onto the image. I added the Cloud Border die with some glitter to the top and then added a little yellow button with twine for the sun. The grass is punched out and then I used the Picket Fence die for the bottom but made sure that the drive way (a separate stamp) came out in between the fence. And then I stamped the cute little birdie taking a bird bath on the bottom left and colored it in with copics. I loved making this card - it was so much fun to add little fun features to the card like the bird bath and cobble stone pathway: here is another angle of the card:


Card Ingredients: 
Stamps: Garden Shed from Taylored Expressions
Paper: October Key Ingredients Kit from Taylored Expressions
Inks: Memento Tuxedo Black and Love Letter
Accessories: Cloud Border die, Picket Fence die, corner chomper, button, twine, glitter, star punch from MS, copics, MS grass border punch

I can't wait to see all the fun creations that the ladies have created today for release day - please hop along with me and check them out:

Thanks so much for stopping by tomorrow - please hop over tomorrow for a fun spotlight hop! Have a wonderful day!
Big hugs,
Sankari :)

PS - here are the dies (
Cloud Border die, Picket Fence die) that I used for today's cards:


Wednesday, November 7, 2012

Taylored Expressions November Sneak Peek Day 2


Hi Everyone!
Welcome to the second day of sneak peeks at Taylored Expressions where today I am featuring samples from two stamp sets from the Totally Tags - Handmade stamp set and from Glasses and Staches stamp set designed by the sweet Nancy McKinney, that will be released on this Thursday, November 8th at 8 am PST. You'll find it all in the Fresh out of the Oven Department at the Taylored Expressions Store.

For my first project, I made a set of tags using the Totally Tags - Handmade set with both the house image and the knit image - here is a picture of all the tags that I made:
This set of three cards uses the sweet image of the little ball of yarn and needle that I paper pieced with different colors of yarn and added a little stickles to and then layered onto the Labels 2 stacklets with some faux stitching along the sides and with a little eyelet at the top using the MME Rosy papers:

I kept the same layout for this next set of three tags featuring the sweet house image that I cut out with felt using the Mini Occasions die and the same faux stitching and Labels Stacklets 2: I love the feel of the felt with tags and used the papers from the October Key Ingredients Kit for the papers with these tags:
The last card that I have features the brand new stamp set: Glasses and Staches - which is SOOO cool!!! They can coordinate with any of the Mokas (so now you can give any Moka some glasses or staches!! Love it!!) , but for this card, I chose to stamp four of the glasses together with separate inks with the sentiment: "Geek is the new Chic"... my friend just got a pair of glasses and I can't wait to give this to her!! All of the sentiments are so sweet and I love that they can paired up with a Moka or just used by themselves!


I can't wait to see what all the lovely ladies have created using all of these gorgeous new stamp sets - please hop around with me and check them out!


Thanks for stopping by today!
Big hugs,
Sankari :)

PS - here is the new Labels Stacklets 2 that will also be released on Thursday:

Tuesday, November 6, 2012

Taylored Expressions November Sneak Peek Day 1


Hi Everyone!
I am still pinching myself that its actually November! Seriously, where did this year go?! Well, today over at Taylored Expressions, we are kicking off all the new stamps and dies which will be released this Thursday, November 8th at 8pm PST! You'll find it all in the Fresh out of the Oven Department at the Taylored Expressions Store!!! Everyday from today through Friday, we will be posting samples from this month's release which are soooo super adorable, whimsical and awesome!!!
Today, I used the new Oh What a Day stamp set illustrated by Emily Burger, to create a congratulations card for my friend who is getting married at the end of November! I am so excited for her and her fiancé and love this sweet little car with the sign "Just Married" on the back with the little cans flying out! I stamped this car onto the new Label Stacklets 2 (I love this new great shape!!!). I sponged the top half with the Clouds Border Die and created a little road scene on the bottom half. I added a little row of buttons from the Mint Cooler collection on the bottom that I "sewed" together with some Baker's Twine and added a Lemon Tart button for the sun. I loved coloring in the car - and add a little ribbon around the card and some liquid pearls along one side just for fun :) I love all the sentiments in this set - totally perfect for every occasion from welcoming babies to graduation!.


Card Ingredients:
Stamps: Oh What a Day! by Taylored Expressions
Ink: Memento Teal Zeal and Tuxedo Black
Accessories: buttons, Mint Cooler buttons, Lemon Tart Buttons, star punch from MS, corner chomper, Baker's Twine, Label Stacklets 2, Small Scallop border Die and Clouds Border die from Taylored Expressions

Don't forget that if you are a fan of Taylored Expressions  on Facebook , you can get an early peek at the stamp sets, as well as a SPECIAL Facebook GIVEAWAY, on Wednesday night beginning at  6 pm PST !!! In the mean time, I can't wait to see all the lovely creations from these amazing artists - please hop around with me and check them out!


Thanks for stopping by today!
Big hugs,
Sankari :)

Monday, November 5, 2012

November Verve Diva Inspiration Hop


Hi Everyone!
Welcome to our November Diva Inspirations Hop!  On Friday night, Verve released their holiday collection of stamps and today we're putting on our monthly hop to inspire you with a fresh mix of old and new! So grab a drink and hop along as we share a little Verve with you! There's a great little prize involved, too! A random commenter on one of the hops will win our entire new release, so be sure to leave a little love in the comment section as you hop about! You can find out all the prize details over on the Verve Blog today.  I love this hop because its fun to see all my favorite Verve stamps in action as I hop around. For today's project, I decided to use one of my favorite sets: Wings of Love which has the sweetest hearts and such lovely inspirational sentiments. I love hearts - I have to say, there is something just so sweet about stamping with hearts - it makes my heart happy :) I stamped three hearts onto some DP and then cut them out and stamped three different sentiments onto them and arranged them in a line. The panel was tilted (Marissa - I thought of you ;) and I added some twine to the center panel and some ribbon to the sides:
Card Ingredients:
Stamp set: Wings of Love from Verve stamps
Inks: Love Letter from Memento and Tuxedo Black from Memento
Paper: Your's Truly from Echo Park
Accessories: Baker's Twine, grosgrain stitched ribbon, dimensionals, bling 

I loved making this card and can't wait to see what lovely creations all of these amazing designers have come up with for today's hop:


1. Betty7. Susan
2. Jend.8. Andrea
3. JenT.9.Charmaine
4. Julee10. Janelle
5.Sankari11. Maureen
6. Sony12. Teresa


Thank you so much for stopping by today!
Big hugs,
Sankari :)

Thursday, November 1, 2012

TE November Calendar Hop

Hi Everyone,

Its the monthly calendar challenge over at Taylored Expressions where the Baker's Dozen DT are showing all the different ways that you can use all the awesome calendar products in the Taylored Expressions store! You can also win a HUGE prize by playing along with us (please check Taylor's blog for all of the details!!) For my project this month I used the Perpetual Occasions calendar - where every month you can note the all the birthdays and anniversaries that fall in that month and then use it every year. The top of each page is blank so that you can personalize that month and for the month of November (HOW is it already November?!!) I used the new exclusive set Falling for You (which you can still buy as a Key Ingredients member) and paired it with the October Key Ingredients Kit
 Here is a closer peek at the page. I paper pieced the tree with the DP from the October Key Ingredients Kit and then sponged the clouds and added some twine to hang from the sentiment: "My heart is filled with thanks". The hill was both with torn pieces of paper and then a grass border on the bottom. I added some leaves on the side of the page in different colors:

 
Project Ingredients:
Papers and ribbons: October Key Ingredients Kit
Accessories: Clouds Border die, sponger, baker's twine and Grass border punch from MS

Please check out all the amazing creations using the Calendar Products at the Taylored Expressions store and we hope you will play along with us!
Thanks so much for stopping by!
Big hugs,
Sankari :)