Today is a super special day! It has been 10 years that Taylored Expressions has been creating amazing stamps and products for all of your crafty needs!! 10 years!!! Congratulations to Taylor and Jon and the whole TE family for sharing their heart and joy with all those they connect with - they are simply amazing!!
I still remember when Taylor asked me to join the TE design team - I couldn't believe it! In the time that I was with the TE DT, I was lucky to go to CHA in California and in Chicago, create concepts for stamps and dies and become part of an amazing TE family!

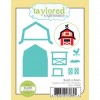
Today I made a bird-day (LOL!) in honor of TE's milestone birthday using: the Tropical Trio Stamp and Die combo, the Build a Scene - Tropical dies and the Go with the Flow Stencil. This sweet stamp set has the cutest birds - and I had to use them all because I didn't want to leave anyone behind!! I created a little scene using all the birds and the stencil to create an ocean feel -- it was so much fun to layer up the Tropical foliage with the dies - also it makes me want to go to some island!

Here is a close up at the card: aren't these birds so adorable??!!

Here is the inside of this card -- So cute to have a little toucan peeking out!

Cardstock: Cookie Monster, Potato Chip, Toffee and Buttercream
Other tools: Go with the Flow Stencil, corner rounder, Best Glue ever, foam adhesives
There are so many amazing cards by so many TE designers who have created a wonderous display of creativity with all these beautiful TE products! Please go to Taylored Expressions blog to check them out!
From the bottom of my heart - I am so grateful to Taylor and this amazing TE family for including me and I adore and love you!
Love,
Sankari
Sankari