Hi Everyone!
 Today is my last day as the October Guest Designer for the Color Throw Down Challenge and I am so so so sad to leave - but so honored and grateful to have had this honor and chance to play along! Thank you lovely CTD ladies for being an inspiration, for your friendship and sweetness! You guys rock! I have loved the Color Throwdown Challenge since the very first challenge - every Weds. a different color
combo with an inspiration photo is given and you can create any project
you want with the colors (even if you don't have the exact colors, just
use what you have that kinda matches and play along!)
Today is my last day as the October Guest Designer for the Color Throw Down Challenge and I am so so so sad to leave - but so honored and grateful to have had this honor and chance to play along! Thank you lovely CTD ladies for being an inspiration, for your friendship and sweetness! You guys rock! I have loved the Color Throwdown Challenge since the very first challenge - every Weds. a different color
combo with an inspiration photo is given and you can create any project
you want with the colors (even if you don't have the exact colors, just
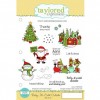
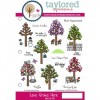
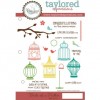
use what you have that kinda matches and play along!) Here are the colors for this weeks challenge - so so so cooool -some how the green and red made me want to make a Christmas card - even though tomorrow is Halloween :) So I made a fun little card using the Baby, It's Cold Outside stamp set with the Shake It Up snowglobe die from Taylored Expressions - such a fun stamp set!

Card Ingredients:
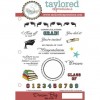
Stamps: Baby, It's Cold Outside stamp set from Taylored Expressions
Inks: Memento Tuxedo Black, Distress Tumbled Glass, Ladybug Red and copics
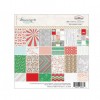
Papers: Webster's Pages: It's Christmas, Bazzill cardstock and Choice Snow White cardstock from TE
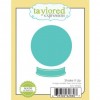
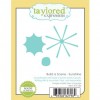
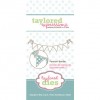
Accessories: snowflakes punch MS, bling, foam dimensionals, corner chomper, Shake It Up die from TE
I stamped the image of the village and then colored it in with copics using the colors from the CTD challenge this week. I then cut it out using the Shake It Up snowglobe die and added the sentiment to the bottom of the snowglobe. I layered some of the DP from Websters and tied it up with some ribbon and added some snowflake with a little bit of bling to the center. You can't really see it, but after finishing the card, I added some gloss to the snowglobe to create some feeling of glass. :)
I truly loved making this card and have absolutely loved my time as a guestie for the CTD challenge :) Thank you SO much ladies for having me over this month!
If you have a chance to play along - check out the Color Throw Down Challenge for more inspiration and play along!
Thanks so much for stopping by today!
Big hugs,
Sankari :)