Thursday, March 6, 2014

Taylored Expressions March Release Day: Shade Tree Scripture

Hi Everyone!

Welcome to Release Day at Taylored Expressions! Woohoo!!! There are so many amazing stamps and gorgeous dies available - seriously - every release I am blown away by the absolute wowness of it all - especially this release - so so so so many possibilities !!

Taylored Expressions is celebrating Release Week with some fabulous giveaways! Visit the TE Blog (insert link: http://tayloredexpressions.blogspot.com/) each Sneak Peek Day this week for details on how you can enter to win.


  For today's project, I made a card using the Shade Tree Scripture stamp set with the Shade Tree Cutting Plate. There are so many lovely uplifting scripture sentiments in this set - perfect to send a little upliftment to someone who might be down! I love the sentiment "The Lord watches over you, He is your shade" - such a beautiful sweet sentiment - makes you feel taken care of, even when things feel overwhelming.

I die cut the tree twice - one with brown cardstock and the second with green cardstock and then placed the brown over the green (after cutting the leaves off the brown) and then added it to a sky that I created using the Cloud Border die and then added some pink bling to the leaves for some flowers - so much fun!!!

I finished it off by adding the sentiment to a panel that I then "hung" on the branches with some twine.
Card Ingredients:
Papers; Kraft, Green DP, and Choice Buttercream cardstock from TE
Inks: Memento Rose Bud and Distress China Blue
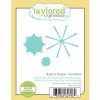
Accessories: Build a Scene Sunshine dies, Shade Tree Cutting Plate, button from stash, MS grass punch, Cloud Border die, sponger, Best Glue Ever and bling


I can't wait to see what all the lovely ladies have created with this amazing release - please hop with me and check them out!


Thanks so much for stopping by today!

Big hugs,
Sankari :)

Wednesday, March 5, 2014

Taylored Expressions March Sneak Peeks: Beauty Lies Within and Bloomin' Stacklets 2

Hi Everyone!!

Welcome to last day of sneak peeks before tomorrow's Release Day from Taylored Expressions! 

Taylored Expressions is celebrating Release Week with some fabulous giveaways! Visit the TE Blog (insert link: http://tayloredexpressions.blogspot.com/) each Sneak Peek Day this week for details on how you can enter to win.

Its been such a fun week of amazing week of showing the different dies and stamps and today I have two projects created with the Beauty Within Stamp set and the Welcome Home stamp set using the Bloomin' Stacklets 2 dies.

The first one is using the Beauty Lies Within set that are a set of dies that matches the Embrace Beauty stamp set that was previously released.So many possibilities on how you can use these dies - I die cut the little birdie out of brown cardstock and set it against a blue DP sky border:

After die cutting the bird - I added some stickles to the little bird to make it pop and then added some white sharpie stitching to the sides of the card as well as along the circle nestabilities:
I used the P & P circle dies to die cut the sentiment: "Hello" and then added some stickles (cinnamon) over the hello lettering:

Card Ingredients:
Taylored Dies: Floral Eyelet Border, P & P Circle Words, Beauty Lies Within die from TE
Papers: Jilibean Soup DP, Kraft, Blue cardstock
Accessories: Stickles (Cinnamon), blue satin ribbon, hat pin, corner chomper, white sharpie pen, circle nesties 


For my second project, I used the new Bloomin' Stacklets 2 dies to create a little flowered flower card with a sentiment from the Welcome Home stamp set. I thought it would be perfect for a returning son or daughter or anyone really!
I added some leafs from the Leafy Branch Die from Taylored Expressions and then circled around the flowers with some white sharpie pen. Each layer was popped up with some foam dimensionals and all papers are from the February Key Ingredients Kit:

Card Ingredients:
Papers; February 2014 Key Ingredients kit from Taylored Expressions
Stamps: Welcome Home stamp set from Taylored Expressions
Taylored Dies: Bloomin' Stacklets 2 and Leafy Branch die from TE
Inks: Adirondack Rich Cocoa and Memento Love Letter
Accessories: foam dimensionals, Best Glue Ever, White Sharpie Gel Pen and Circle Nestabilities


I can't wait to see what all the amazing creations the DT have come up with today - please hop with me and check them out!!!
Thanks so much for stopping by today! Please hop on back tomorrow for release day fun!Ciao for now!
Sankari :)

Verve Divas Inspiration Hop (March '14) - Where Dreams May Go!

Welcome to Verve's March Diva Inspirations Hop. It's the 5th of the month and that means it's hopping time! This month we've got a fabulous challenge that's sure to put a string in your step! So in addition to a comment prize hidden along the hop, you can play along with the challenge and link up your creation for a chance to win another prize!
Our March challenge is Spring Has Sprung:

It's time to ditch the winter blues! Create a card that sings Spring using inspirational quotes, pretty colors and florals or themes that celebrate new life. Whether you draw inspiration from the graphic or blaze your own trail, just show us what spring means to you!

I love this challenge just because it gives me hope that spring is around the corner! I used the stamp set Blue Skies for this challenge (such a great stamp set! such great sentiments!!!) and stamped the sentiment onto the notebook image stamp in this set and followed the sketch for the Mojo Monday challenge #335 (holy moly - 335 sketches!) Here is my take on the sketch and this challenge:
Here is a close up of my spring card - a little flower, some pearls, twine and some lacy pennants (from the ek success border punch)- I highlighted the one with a blue copic:

Card Ingredients:
Stamps: Blue Skies from Verve Stamps
Inks: London Fog, Tuxedo Black, Rich Cocoa
Papers: My Mind's Eye
Accessories: pearls, heart punch (mini), prima fairytale roses (teal), lace ribbon, foam dimensionals, ek success border punch, white sharpie gel pen, twine

I loved making this card - I seriously LOVE Julee's amazing stamps with these gorgeous fonts, sentiments and sweet images! Need a little inspiration? Check out the blogs linked below to see what the other Divas did with the challenge! It's sure to be a treat, and speaking of treats, we've got a prize for one lucky commenter along the hop! Check out the Verve Blog today for all the prize info and deadlines.
1. Amy 11. Julee
2. Anya 12. Teresa
3. Betty 13. Stacey
4. Jessica 14. Marisa
5. Karen 15. Laurie
6. Sankari 16. Maureen
7. Sarah 17. Jen
8. Sony 18. Christyne
9. Susan 19. Charmaine
10. Tiffany 20. Andrea


Tuesday, March 4, 2014

Taylored Expressions March Sneak Peeks: Pockets and PagesApril Script

Hi Everyone!

Welcome to the second day of the March Release fun from Taylored Expressions!!!! 

Taylored Expressions is celebrating Release Week with some fabulous giveaways! Visit the TE Blog (insert link: http://tayloredexpressions.blogspot.com/) each Sneak Peek Day this week for details on how you can enter to win.


For my project today I made a scrapbook page using the new Pockets & Pages - April Script dies from the P& P collection from TE! First of all I absolutely love this way to scrapbook! SO much fun! And second - I love that you can make it your own with all the P&P die collection.

I made a scrapbook page (12x12) from a raspberry picking outing that we went on almost 5 years ago! I have been wanting to scrap this outing for so long - but suddenly its five years later!! Here is my little page from the raspberry picking:


I used the April Script to "write out" the words: "Spring" and "bloom" - i love the cursive font and just adding it right onto a page makes that photo or page so unique. I also used the In Flight Overlays - which are butterfly dies - and spread them here and there on the photos. I also used the P&P 2x2 Essentials to use the arrow die for on the bottom left picture.  I know that raspberry picking was probably more in July than the spring, but I feel like it is spring just looking at these pictures after this horrible winter! LOL! You can click on each picture to enlarge it:


I just love looking at these pictures - where has the time gone?! I made a little flower with my little girl at the center of the flower using the soon to be released Bloomin' Stacklets 2 dies - so easy to create a fun flower - with different DPs or just solid colors - I can't believe she used to be so so so little!
Scrapbook Page Ingredients:
Papers: Bazzill cardstock and Simple Stories Snap Life collection (6x6 DP)
Taylored Dies: Pockets and Pages April Script , Pockets and Pages 2x2 Essentials, Bloomin' Stacklets 2, In Flight Overlays
Accessories: corner chomper, Best Glue Ever, EK success small scalloped border

Can't wait to see what all the lovely ladies have created with all the new stamp sets and dies - please hop around with me and check them out:
Thanks so much for popping over today!
Big hugs,

Sankari :)
 

Monday, March 3, 2014

Taylored Expressions March Sneak Peeks: Welcome Home!


Hi Everyone,


Welcome to the March Release from Taylored Expressions!!! Woo-hooooo!!! Today I am so so so so excited to show projects that I made using the new Welcome Home stamp set using the coordinating new Build a House Dies! I have been wanting dies and a stamp set that go together where you can mix and match and create your own house (and this works perfectly with the Build A Scene dies)!!! Woohoo! I sent a concept to Taylor, who totally agreed and sent the concept to be illustrated and voila - we have the Build A House dies and Welcome Home stamp set that will be released on Thursday!!!! YAY! 

PROJECT 1: Home is Where the Heart is Home Decor

For my first project, I created a little framed shadowbox home decor item that I can hang on our walls with the sentiment that reads: Home is Where the Heart Is. I love the sentiment and love the idea of walking by and seeing it up on the wall everyday :). I created an 8x8 page that would fit into the 8x8 shadow box. I sponged the background with clouds from the Cloud Border die and created hills using the Build A Scene dies (Rolling Hills and Sunshine dies):

Here is closer peek at my sky and sentiments. After creating the sky with the Cloud Border die by sponging it - I put an overlay over it with the Ride the Wave Border die. I love this die and even though they are supposed to be waves, I thought they would be fun swirly clouds slowly moving across the horizon :) I created the sun using the Build A Scene - Sunshine dies and then put a button on the sentiment:


Here is another view of the houses - I used the Build A House dies to die cut the house shapes from different papers from the Basic Grey - RSVP collection. I love that you can mix and match the houses and roofs - I die cut them and then colored them in with copics. The doors and and windows were cut out and then colored in - the lampost and tree were also dies in this die collection. I cut out the hills and then painted some of them, crimped others and added some liquid pearls to another layer :)
Here is a closer peek at one of the houses that has both stamped images and die cut images mixing together. I put a brad on the door for the doorknob and the tree bark is die cut and the "leaves" of the tree are made from the die in the Build a House dies (that can also be a cloud) :
And a final view of the whole scene - I just love all the elements in this stamp set and coordinating die - seriously - there are soooooo sooooo many fun elements that comes with the Welcome Home stamp set and Build a House dies that the possibilities with what you can create and combine together are simply amazing!!

Scrapbook Page Ingredients:
Stamps: Welcome Home by Taylored Expressions
Inks: Memento Love Letter, Tuxedo Black and Distress China glass
Taylored Dies: Ride the Wave Border, Cloud Border Die, Build a House dies, Build a Scene: Sunshine dies, Build a Scene Rolling HIlls
Accessories: Shadow Box, MS grass punch, crimper, liquid pearls, green paint, foam dimensionals, button and twine from stash, corner rounder, Best Glue Ever 


 PROJECT 2: We've Moved (Moving Announcements)

For my second project, I created some moving annoucements using the same Welcome Home stamp set and Build A House dies! At the beginning of the January, our family moved to a new house and the whole process has been so overwhelming! I have to say that moving is horrible but moving during the Polar Vortex with the insane amount of snow and ice and snow and ice has been so hard and so cold! We are still in boxes, I feel like we will be in boxes till forever, but slowly slowly we are trying to unpack. I thought it would be fun to create a moving announcement (just a one sided A2 card)  - here is what one of them would look like:
 On the back I was thinking to write a personal message and have a picture of our new house. I started out by die cutting the houses, roofs and circular elements to the card (along with windows and doors) :

 I then started assembling the pieces together:
And then assembled them all together and then created added different colors of ribbon and tied a bow to one side of the card:


Here is a side view of the annoucements - I popped up the houses and sentiment with some foam dimensionals :

Card Ingredients:
Paper: A2 one sided card (Choice SnowWhite) with Bazzill cardstock in primary colors
Inks: Memento Love Letter ink
Accessories: Build a House Dies, Circle Nesties, EK success circle punches, ribbon from stash, tape runner, best glue ever, foam dimensionals, cloud border die, corner chomper, White sharpie pen, paper crimper, sponger, MS grass punch and star punch  


I loved making these personal moving annoucements - and I can't wait to see what the rest of the design team has created using all of the new stamp sets and dies - Please hop along with me and check them out here:
Thanks so much for stopping by! Please hop over tomorrow for more TE sneak peeks!
Big hugs,
Sankari :)