Thursday, February 6, 2014

Taylored Expressions February Release Day: Hello Spring!


Hi Everyone,
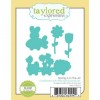
YAY! Its Release Day from Taylored Expressions - there are a ton new dies and stamps ready for crafting! Today, I am showing a new coordinating die (the Spring is in the Air die) that perfecting cuts out images from the previously released stamp set called: "Hello Spring". SO as I am typing this - the ground around me is covered in 400 feet of snow... okay maybe like 2 feet - but that is a TON of snow! I can't even tell you HOW nice it was to make a spring card in the dead of winter! Its like a breath of warmth - just looking at this card makes me hopeful and happy that it will be spring one day again soon!! :) 

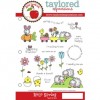
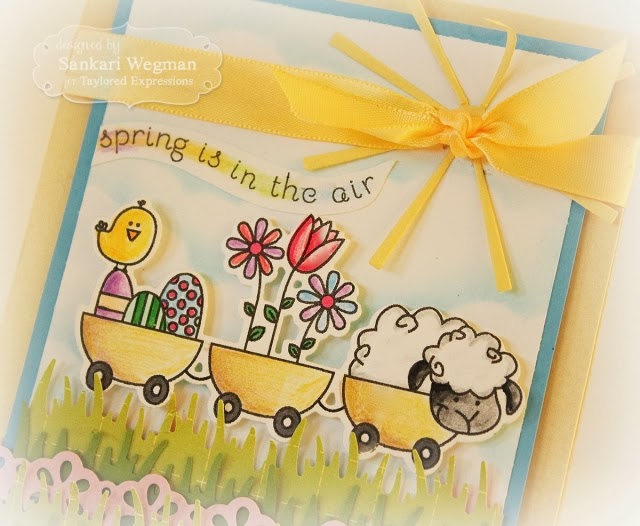
I created my card by coloring in this super cute train image of the sheep, chicken, eggs and flowers and then die cut it with the coordinating Spring is in the Air die:
.
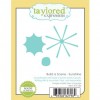
Here is a close up image of the die cut - I LOVE to cut images out - but this is awesome - it also cuts in between the train carts and all around the whole image in just one fell swoop cut :) I then sponged some clouds and added a sun from the Build A Scene - Sunshine die and tied a yellow ribbon so that the end of the ribbon were like sun rays :)

 Card Ingredients:
Stamps: Hello Spring from Taylored Expressions by Sankari Wegman
Paper: Choice White card stock, assorted colored card stock
Inks: Memento Tuxedo Black and Colored Pencils
Accessories: sheer green ribbon, satin golden ribbon, Spring is in the Air die, dimensionals, Build A Scene - Sunshine dies, Cloud Border die, Floral Eyelet Border, Grass punch from MS 

I can't wait to see everyone's fantastic release day projects - please hop aroundwith me and check them out:
Big hugs,
Sankari :) 


Wednesday, February 5, 2014

Taylored Expressions February Sneak Peeks: Ruffle My Feathers Cutting Plate and Eggstra-Special birdhouse

Hi Everyone!

Today I am so excited to share some projects that I have made with the soon to be released Ruffle My Feathers cutting plate from Taylored Expressions.This is such a cooling cutting plate - I think it might be my favorite (ok - they are all my favorite!) but this one is so cool - I die cut it with some paper thin handmade blue paper and it really did feel like light feathers - I then added a little bit of blue bling to each feather for that added blingalicious effect :)

I used the sentiment "Thank You " from the Wispy Wishes stamp set (also will be released tomorrow) - this same set has a beautiful row of hearts that I stamped next to the sentiment that cut out with the Banner Stacklets 2 dies and then attached with a large eyelet and some ribbon:


Card Ingredients:
Stamps: Wispy Wishes from Taylored Expressions
Paper: handmade blue paper and various colored card stock
Inks: Teal Zeal and Lulu Lavender from Memento
Accessories: Dimensionals, Best Glue Ever, Bling, Ruffle My Feathers Cutting Plate, Banner Stacklets 2
 I used this same Ruffle My Feathers cutting plate for my second project where I decorated a birdhouse using this awesome cutting plate as little tiles for the roof :) and paired it with the Eggstra-Special stamp set that has this lovely sentiment with these darling birds!
Here is another angle of the bird house. I started out by painting it and then adhered DP from the December KI kit:


I cut the Ruffle My Feathers cutting plate on some red cardstock twice and then measured the roof and trimmed it accordingly and added a little roof covering to the center  with some red cardstock and DP:
I added some stickles to the center of each part of the feathers on the cutting plate and then finished off the whole birdhouse with some ModPodge - this gave my roof some heaviness so that the cut edges from the Ruffle My Feathers cutting plate maintained their curl upwards:
Here is a close up of the birdhouse with the Eggstra-Special stamp set - I love these two sweet birds - I colored them with copics and then adhered them to the birdhouse and then added the sentiment to one corner and some prima flowers to the other side:


I can't wait to see what all the designers have created with these awesome new dies and stamps - please hop around with me and check them out:
Thanks so much for stopping by!
Hugs,
Sankari :)


Verve Diva Inspiration Hop - February 2014

Hey Everyone,

Welcome to Verve's February Diva Inspirations Hop. It's the 5th of the month and that means it's hopping time! This month we've got a bloomin' good challenge for you along with our usual inspiration! So in addition to a comment prize hidden along the hop, you can play along with the challenge and link up your creation for a chance to win another prize!
Our February challenge is Floral Fantasy:

February is the month of love and flowers are a popular gift
so add some petal power to your cards this month!


For my card today, I decided to keep it simple with the flower theme - I used the flower that is part of the cake from the Big Wish stamp set for the Floral Fantasy Theme and mixed it up with the sentiment from the Joyful Blooms.  I tried to keep the colors of the card the same as the inspiration picture (I used some of my Basic Grey from way back - so good to use my scraps!) It was so much fun to make this card - just in time for my friend's party this weekend :)
Here is a close up of my card with the flower as part of the cake (can I just say that now I want cake :) Anyone have recommendations for some good cake recipes? I also found this felt loop ribbon trim from a few years ago - so glad that I kept it - it was the perfect addition to this card - yay for scrap hoarding :) j/k lol!!!

Card Ingredients:
Stamps: Big Wish stamp set and the sentiment is from the Joyful Blooms.
Inks: Memento Tuxedo Black, Love Letter and copics
Papers; Basic Grey (and die cut from the Sweet Shoppe)
Accessories: dimensionals, felted loop ribbon trim, twine, liquid pearls and corner chomper

Need a little inspiration? Check out the blogs linked below to see what the other Divas did with the challenge! It's sure to be a treat, and speaking of treats, we've got a prize for one lucky commenter along the hop! Check out the Verve Blog today for all the prize info and deadlines.

Thanks so much for stopping by!
big hugs!

Sankari :)
1. Julee11. Tiffany
2. Amy12. Maureen
3. Anya13. Stacey
4. Betty14. Christyne
5. Jessica15. Teresa
6. Karen16. Marisa
7. Sankari17. Charmaine
8. Sarah18. Janelle
9. Sony19. Jen
10. Susan


Tuesday, February 4, 2014

Taylored Expressions February Sneak Peek: Big Bold Easter and Proud Peacock Cutting Plate

Hey Everyone!!!

All the February peeks this week from Taylored Expressions have been so cute and today we are continuing our blog hop today with more peeks! For my first project today, I created  a little Easter gift set using the new to be released Big Bold Easter stamp set. I love the fonts and sentiments in this set! I also created a little gift favor using the Wicker Pocket die and a little flower seed pocket - here are both the card and Wicker Pocket die favor with the seed packets:


Here is a closer picture of the card - I love the sweet font of this sentiment - such a beautiful font! I created a flower card using the Bloomin' Stacklets dies and the Twiggy Branch die and added a little sweet embellie  butterfly by combining Elegant Butterflies with the Elegant Butterflies Overlay dies:
Here is a little gift/favor made using the soon to be released Wicker Pocket die from TE - I love how easy it was to make this - just a few little pieces here and there and voila - an easy to give favor! I added a little flower packet full of seeds just waiting to be plants!

Card Ingredients:
Stamps: Big Bold Easter from Taylored Expressions
Inks: Memento Rose Bud
Paper: Dec. Ki Kit from TE
Accessories: Circle nesties, Bloomin' Stacklets 1, Wicker Pocket die, Twiggy Branch, Elegant Butterflies, Elegant Butterfly Overlays and dimensionals


For my second card, I was so excited to use this soon to be released cutting plate could the Proud Peacock cutting plate and mixed it with the sentiment and peacock feather from the Wispy Wishes stamp set. I love peacocks and the colors are so rich and gorgeous!! I love this cutting plate - it is so cool!! It is perfect for covering an A2 card, but for this card I cut it a little bit so that I could put a sentiment on the top:

I cut this same cutting plate with some green glitter paper and then adhered it to some of the feathers and then colored them all in with copics. I added a little bit of bling to the centers of the feathers and added some sponged green and blue colors to the sentiment with a little faux stitching going around the circle :)
Card Ingredients:
Stamps: Wispy Wishes from Taylored Expressions
Inks: Memento Bamboo Leaves and Teal Zeal and colics
Papers; Cardstock of various colors
Accessories: Proud Peacock Cutting Plate, Wispy Feathers dies, bling, grosgrain ribbon , circle nesties, corner chomper


I can't wait to see what the awesome DT has created with all the wonderful stamps and dies - please hop along with me and check them out here:
Thanks so much for stopping by! Please pop over tomorrow for more peeks!!
Big hugs,
Sankari :)


Monday, February 3, 2014

Taylored Expressions February Sneak Peeks: Graphic Greeting (St Paddy's) and Sack It To you Leprecahun!

 HI Everyone!!!

I am so excited to share some of the goodies that will be released this week from Taylored Expressions!!! There are going to be soooo many new dies, cutting plates and the cutest stamps to boot - and to start out with - I am showing some new St.Paddy's fun starting off with the continuation of the Graphic Greetings series and this one is called Graphic Greetings - St. Paddy's. I love all the Graphic Greetings and all the fun things that they have all in one stamp - but for this card, I thought I would focus on one of the sentiments: "Kiss Me" and cut that out from the group and the great a card around that.

For this card, I used the Party Banner Cutting Plate and then in the spot where you can put the sentiment, I popped up the sentiment "Kiss Me" (one of the sentiments from this stamp set) and then added some lips and hearts along with the new Floral Eyelet Border under the sentiment "Kiss Me":

I also added a line of stickles to the pennant rows and then added a 4 leaf clover that is part of the Graphic Greetings set and then also popped it up near the kissy lips and above the graphic greeting  sentiment  - here is a closer peek:

Card Ingredients:
Stamps: Graphic Greetings - St.Paddy's Day from Taylored Expressions
Paper: Green Cardstock and Jillibean Soup DP
Inks: Memento Bamboo LEaves
Accessories: Party Banner Cutting Plate, Floral Eyelet Border, stickles, heart punch and dimensionals

So much fun to add some lips to a St.Paddy's day card :) and to continue with the Luck of the Irish  theme, my second project features the continuation of the Sack It To You series - where you can create a favor by making a sack and then decorating it as you wish - ooooorrrrr.... you can create a gift pack by putting this ontop of the Junior Mints packet for a ready to eat snack at your fingertips!!! I LOVE me some Junior Mints - this is my definition of a lucky Irish treat :)

Here is close up view of this tag - isnt he just the cutest little guy ever? I love the sparkle in his eye and his fun little smoke pipe. I paper crimped his beard and then added a little color to cheeks by distressed it a little bit:
 

Project Ingredients - Junior Mints pack

Stamps: Mocha Shannon from Taylored Expressions
Inks: Memento Bamboo Leaves
Paper: various colored card stock and Choice Buttercream card stock
Accessories: Sack It To You - Leprechaun, paper crimper, Embossing Plate


I embossed the hat and then using the Moka Shannon stamp set that will be released this week, I stamped the sentiment : Happy St.Paddy's Day (with the four leaf-clover coming out of his hand. I also created some rosy cheeks - he looks like such a fun little guy to hang out with!!!

I can''t wait to see what everyone has created with all the awesome stamps and dies that will be released this week - please hop with me and check out all the wonderful creations today!!!
Thanks so much for stopping by today!
Big hugs,
Sankari :)